Are you tired of your current hairstyle and looking to add length and volume to your locks? Look no further! In this comprehensive DIY guide, you will learn how to make clip-in hair extensions like a pro. Say goodbye to expensive salon visits and hello to customized extensions that perfectly match your natural hair. Whether you want to rock a glamorous red carpet look or simply enhance your everyday style, this step-by-step tutorial will equip you with the knowledge and skills to create your own clip-in hair extensions.
What Do You Need To Make Clip-In Hair Extensions?
To diy clip in hair extensions, you will need the following items:
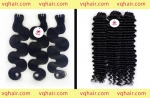
1. Hair Wefts: High-quality hair wefts or extensions that match your desired hair color and texture.
Things To Consider Before Buying weft Hair Extensions for clip in hair extensions diy
- Quality: Opt for high-quality hair extensions made from 100% human hair. Remy hair, which maintains the cuticle layer and aligns the strands in a natural direction, is a preferred choice for a more realistic look.
- Length: Determine the desired length of the extensions based on your styling preferences and natural hair length. Consider whether you want to add volume, length, or both.
- Color: Choose hair extensions that closely match your natural hair color. If you're unsure, consider consulting a colorist to find the best match or select extensions that can be dyed to match your hair.
- Texture: Select hair extensions with a texture that matches your natural hair, whether it's straight, wavy, or curly. This will ensure a seamless blend and prevent the extensions from looking artificial.
2. Clips: Small hair clips or wig clips that have a secure grip and can be easily attached to your natural hair.
3. Needle and Thread: A sewing needle and matching thread that will be used to attach the clips to the hair wefts.
4. Scissors: Sharp scissors to cut the hair wefts to the desired length and trim any excess.
5. Measuring Tape or Ruler: To measure the correct length of the hair wefts based on your head size and desired placement.
6. Hair Glue or Adhesive (optional): If you prefer a more permanent attachment, you may need hair glue or adhesive to secure the wefts instead of sewing them.
7. Comb or Brush: To detangle and prepare the natural hair and extensions for application.
8. Hair Clips or Hair Ties: To section off your natural hair and keep it organized while working on the extensions.
9. Mirror: A mirror or a friend's help to ensure accurate placement and blending of the clip-in extensions with your natural hair.
10. Styling Tools and Products: Optional styling tools like curling irons, straighteners, or products like hairspray, serum, or heat protectant, depending on your desired hairstyle.
Having these supplies on hand will enable you to create your own clip-in hair extensions and customize them to suit your desired look.
Learn More: How to Untangle Matted Hair and tips to avoid It?
How to do clip in hair extensions? - Detailed guide
Creating clip-in hair extensions is a fun and customizable way to enhance your hair's length and volume. Follow this step-by-step guide to learn how to do clip-in hair extensions like a pro:
Step 1: Gather the necessary materials. You will need hair wefts, clips, a sewing needle, matching thread, scissors, a measuring tape or ruler, a comb or brush, hair clips or hair ties, and a mirror.
Step 2: Measure and prepare the wefts. Take a measuring tape or ruler and measure the desired length of each weft. Use the scissors to cut the wefts to the measured length, ensuring they match the width of your head.
Step 3: Attach the clips. Take a weft and position a clip at one end. Sew the clip securely onto the weft using a needle and thread. Repeat this process for all the wefts, spacing the clips evenly along the width of each weft.
Congratulations, your clip-in hair extension is ready to use. Let's go to the next step!
How to install clip in hair extensions - Easiest way
Installing clip-in hair extensions is a straightforward process that can be easily done at home. Follow these simple steps to install clip-in hair extensions:
.jpg)
Step 2: Section your hair. Take a comb and section off your hair horizontally at the back of your neck to begin the installation. Clip the rest of your hair up to keep it out of the way.
Step 3: Prepare the clip-in extensions. Take one of the wefts and open the clips attached to it. Ensure that the clips are secure and in good condition.
Step 4: Attach the first weft. Starting at the back, position the weft along the parting you created. Snap the clips closed, securing the weft to your natural hair. Make sure the clips are firmly attached and the weft lies flat against your scalp.
Step 5: Create another parting. Release a new section of hair above the first weft and create another horizontal parting. This will be where you attach the next weft.
Step 6: Continue attaching wefts. Repeat the process of attaching the wefts, moving upwards towards the crown of your head. Ensure that each weft is securely fastened and evenly spaced.
Step 7: Blend the extensions. Once all the wefts are attached, gently comb through your hair to blend the extensions with your natural hair. Use a mirror to check for any visible gaps or unevenness.
Step 8: Style as desired. Now that the clip-in hair extensions are installed, you can style your hair as desired. Curl, straighten, or create different hairstyles to achieve your desired look.
Step 9: Secure and adjust. After styling, ensure that the clips are still secure and comfortable. Make any necessary adjustments to the placement of the wefts for a seamless blend.
Remember to remove the clip-in hair extensions before sleeping or swimming and take care of them properly to maintain their quality. With practice, installing clip-in hair extensions will become quick and effortless, allowing you to enjoy instant length and volume for various hairstyles.
Learn More: How To Maintain Deep Wave Hair
FAQs
How to make clip in hair extensions look natural ?
To make clip-in hair extensions look natural, choose extensions that match your hair color and texture. Blend the extensions with your natural hair by styling them together, using techniques like curling, straightening, or adding waves. Use a comb or brush to gently blend the extensions with your own hair, creating a seamless transition. Additionally, ensure that the extensions are securely clipped close to the scalp for a natural appearance. Take time to adjust and position the extensions properly, checking in a mirror from different angles to ensure they blend seamlessly. Finally, use styling products sparingly to maintain a natural look and avoid weighing down the extensions.
How to Maintain Clip- In Hair Extensions?
To maintain clip-in hair extensions, brush them gently with a wide-toothed comb, wash them with sulfate-free products when needed, and let them air dry. Store them in a clean, dry place and avoid excessive use of styling products. Detangle the extensions carefully and avoid sleeping with them. Don't forget to book regular maintenance appointments for your semi-permanent extensions to ensure they stay looking their best. By following these tips, you can keep your clip-in hair extensions looking beautiful and prolong their lifespan.
Conclusion
To put it simply, making your own clip-in hair extensions at home doesn't require intricate skills. After reading these step-by-step tutorials on "How to make clip in hair extensions " you'll feel empowered to take on the DIY challenge. If you still feel uncertain, explore our shop to discover your desired hairstyle. Our factory specializes in high-quality, 100% human hair clips, available at reasonable prices and featuring diverse designs.


.jpg)
.jpg)
.jpg)


_cr_150x98.jpg)

_cr_150x98.jpg)
_cr_150x98.jpg)
_cr_150x98.jpg)
_cr_150x98.jpg)